Configuring your Local Email Client (Eudora 4.3/5.0)
Follow the instructions below to configure Eudora 4.3/5.0 for use with your Venue Communications, Inc. POP3 account.
Note: An example account name was used through the instructions. Please substitute your Venue Communications, Inc. POP3 email address information for the account used in the instructions.
The example email address is: yourname@yourdomain.com
The example Domain is: yourdomain.com
Configuration Steps
1. Start the Eudora program from your desktop or from the Eudora Program group menu (go to the Start button on Windows, choose Programs and then choose Eudora).
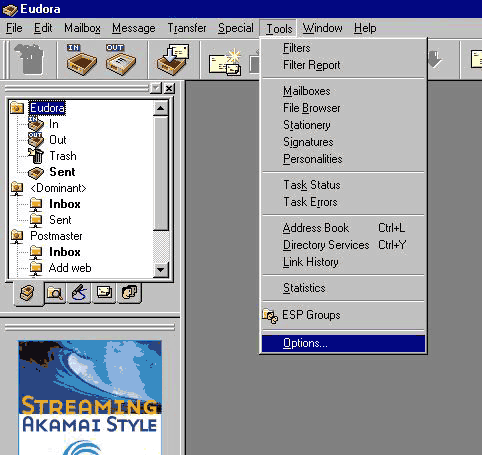
At the main Eudora screen, click on the Tools menu item, then select Options from the pull down menu. (see below)
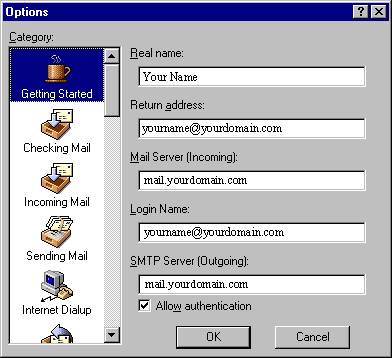
2. Choose the Getting Started icon/button. On this screen you will need to fill in the Real Name, Return Address, Mail Server (Incoming), Login Name and SMTP Server (Outgoing) values.
Mail Configuration Settings Values for Settings
--------------------------------------------------------------------------------
Real Name: Your Name
Return Address: yourname@yourdomain.com
Mail Server (Incoming): mail.yourdomain.com
Login Name: yourname@yourdomain.com
SMTP Server (Outgoing): mail.yourdomain.com
Allow Authentication: checked (turned on)
-------------------------------------------------------------------------------
Note: Your login name is your FULL POP3 email address.
Eudora and Eudora Lite settings are similar, but the program requires users to be completely defined.
username%mail.domain name.com@mail.domain name.com
The above goes into the pop account box.
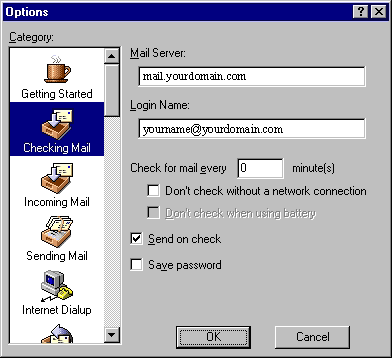
3. Click on the Checking Mail icon/button. The values for Mail Server and Login Name should already reflect your changes made earlier in step 2. (Verify that the Mail Server and Login Name are completed.)
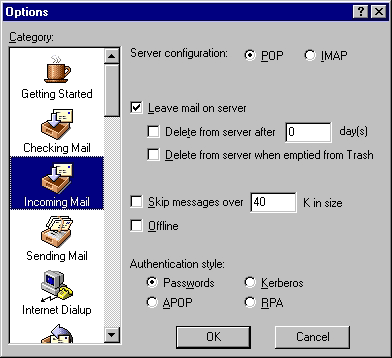
4. Click on the Incoming Mail icon/button.
5. Click on the Sending Mail icon/button. The values for SMTP Server and Return Address should already reflect your changes made earlier. If not, change them to the correct settings for your account.
Make sure that the Allow Authentication box is checked (turned on).
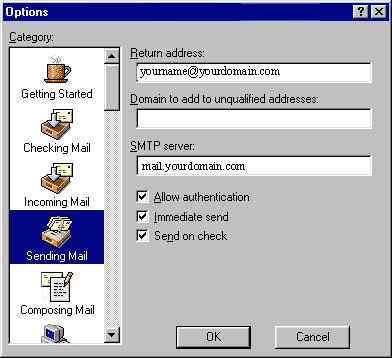
6. Click OK after making your changes.
Recent security enhancements require authentication when sending mail. Under your outgoing mail server settings choose to authenticate when sending email. If asked, the method of authentication is MD5 Challenge-Response.
Configuration is complete!

