Configuring your Local Email Client (Outlook 2000, or upgraded Outlook 97/98)
Follow the instructions below to configure Outlook 2000 for use with your Venue Communications, Inc. POP3 account.
Note: An example account name was used throughout the instructions. Please substitute your Venue Communications, Inc. POP3 email address information for the account used in the instructions.
The example email address is: yourname@yourdomain.com
The example Domain is: yourdomain.com
Special Note to Outlook 97/98 users:
The following instructions are for Outlook 2000 and Outlook 97'/98' when the Accounts sub-option under the Tools menu is displayed (rather than the Services sub-option). In some cases, depending on how Outlook was installed or upgraded, the Services sub-option will be displayed on the Tools menu instead (in this case, use the Outlook 97' instructions for making the needed configuration changes).
Configuration Steps
1. Start Outlook 2000.
2. When the main Outlook 2000 screen appears, click on the Tools item on the top menu bar (or press ALT-T), then choose/click the Accounts sub-option (as shown below):

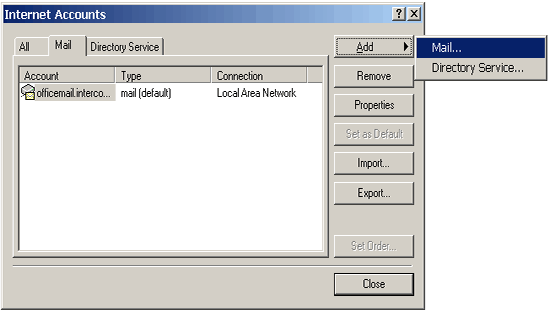
3. From the Internet Accounts screen, click on the [Mail] tab at the top. This will show all the mail accounts configured in your Outlook 2000 (it will be empty if you don't have an account set up already).
Click on the Add button on the right and choose the Mail option, this will add a new mail account using the Wizard. The Wizard will guide you through the information gathering and configuration steps.
Follow the Wizard and enter in the information asked in each screen.
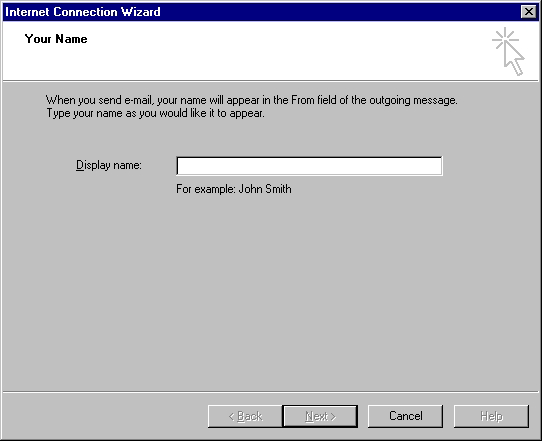
4. On the Your Name screen below, simply enter in your name. Whatever you enter here will appear in the “From” field when someone receives email from you. You can use your full name, or Webmaster, or anything you like. Then, click “Next.”
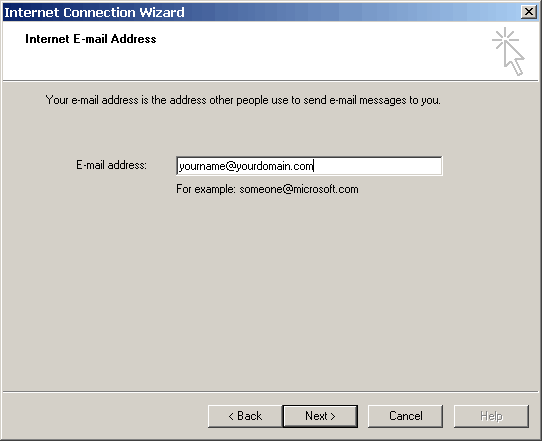
5. On the Internet E-mail address screen, enter in your Venue Communications, Inc. POP3 email address. The example account used is yourname@yourdomain.com. Please enter in your Venue Communications, Inc. POP3 email address. Click the Next button when you are finished.
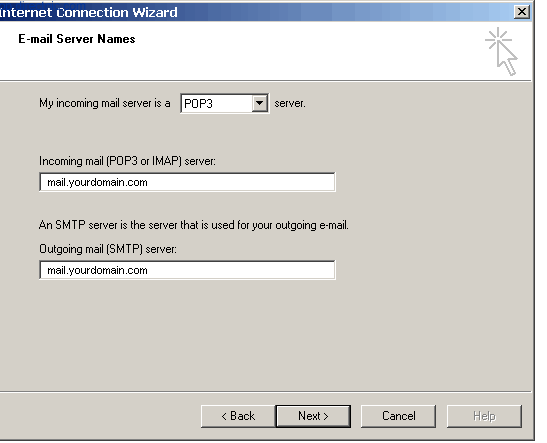
6. On the E-mail Server Names screen, enter in the Venue Communications, Inc. POP3 email server names mail.yourdomain.com. Then, click the Next button.
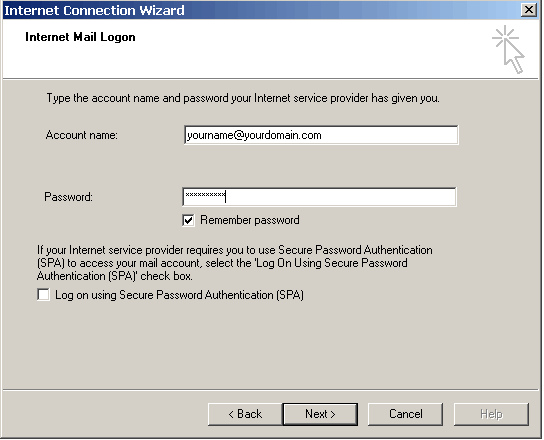
7. On the Internet Mail Logon screen, enter your Venue Communications, Inc. POP3 email account name and password. Your account name is your FULL email address (yourname@yourdomain.com). You can select Remember password if you like.
Do not check the box labeled "Log on using Secure Password Authorization (SPA)".
Click the Next button when you are finished.
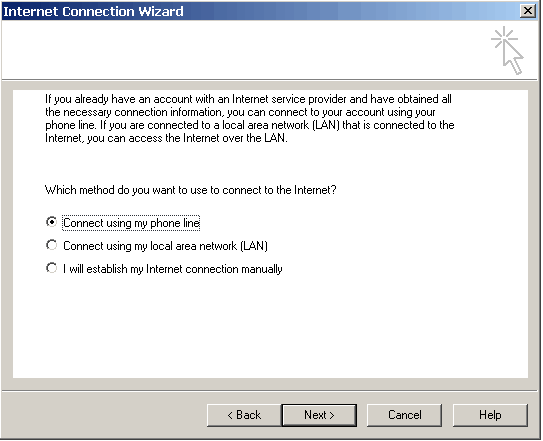
8. On the last screen of the Wizard, choose the option that describes your connection to the Internet. If you use an ISP, you will likely choose "Connect using my phone line". You may be prompted to enter your phone line information on the next screen. If you work in an office or have a dedicated Internet connection, you will probably choose the LAN option. When finished, click the Next button.
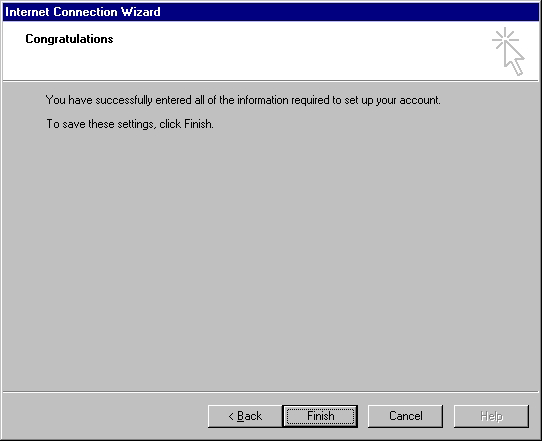
9. On the Congratulations screen, simply click the Finish button to return to the Internet Accounts screen.
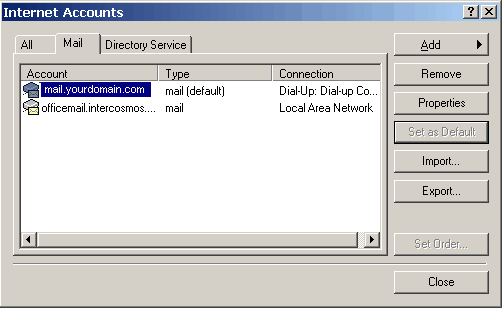
10. At this point, you are returned to the Internet Accounts screen. You can set the new rule as your default if you want to use this address as your primary email account in your email program. Click Close when you are finished, then you will need to log out and restart your Outlook 2000.
Recent security enhancements require authentication when sending mail. Choose the email account that has been created and click properties. Click the servers tab. Check the box next to "My server requires authentication".
The Wizard will automatically update the properties while you are setting up the account. From this screen, click on or highlight the mail account just created and click on the Properties button to the right. You can verify the information you just entered by clicking each tab. By default, My server requires authentication, a feature under the Servers tab is not checked. You do not have to enter your username and password every time you send out an email if this feature is not check.
At the Account Properties screen, click on the Close button to return to the main Outlook 2000 screen.
Configuration is complete!